Many times there is a need in React App to open a Model or Dialog Box in React JS App. Here in this tutorial, we will be learning the way to open dialog box in react js app.
Table of Contents
What we will learn in this post?
- Adding Material UI In react js
- Creating Function Component In React.
- Adding Dialog Box React Js
- Opening And Closing Dialog Box in React Js
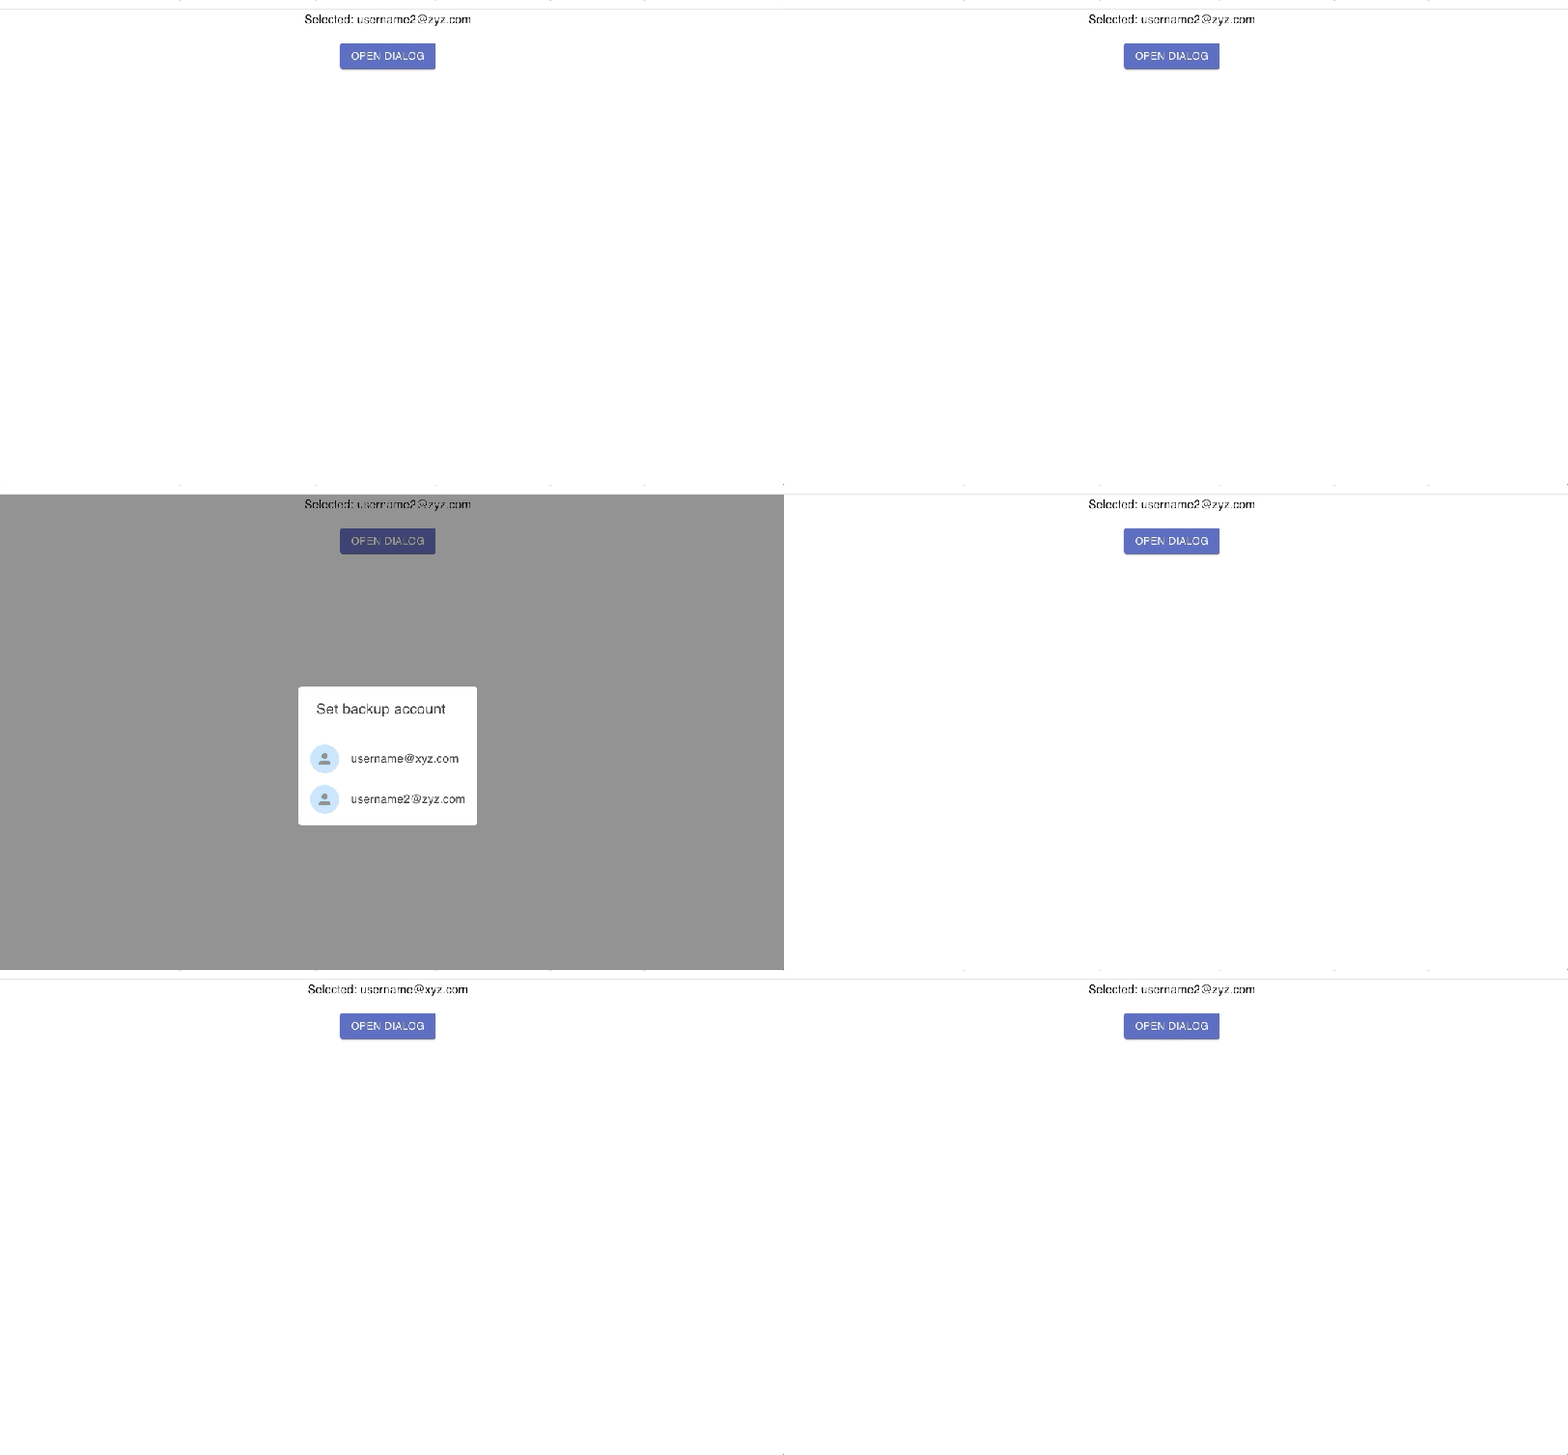
What we will create
We will be creating some thing like this.

Adding Material UI in react js
Material UI is CSS And Javascript frame work that provides easy web development in react js. Material Ui is easy to add to react js app. To add material ui to react app we will follow below steps.
Step 1: Go to your project’s parent directory and open terminal or cmd their.
Step 2: Run this Command npm install --save @material-ui/core & npm install --save @material-ui/icons this command will install marterial-ui/core code and material-ui/icons module and add the entries to package.json file under dependencies
package.json
 "dependencies": {
    "@material-ui/core": "^4.9.14",
    "@material-ui/icons": "^4.9.1",
    "@testing-library/jest-dom": "^4.2.4",
    "@testing-library/react": "^9.5.0",
    "@testing-library/user-event": "^7.2.1",
    "react": "^16.13.1",
    "react-dom": "^16.13.1",
    "react-scripts": "3.4.1"
  },
Now, we have added material ui/core and material-ui/icon dependencies in our react app. Now we are good to create components for our dialog.
If you do not know about setting the react js app in local then this post will have no use for you as won’t be able to do any practical. You can check our post to do setup React app in local.
Creating Functional Components in React Js
Now, we will create our required components dialog or Model box. Here we will create 2 components
ParentComponent.js
- ParentComponent will hold button that will open our dialog box in react js. ParentComponent will be responsible for sharing all data required by childcomponent. like
- emails (At line 27): this is a list of emails
- open (At line 29): This is state variable holds boolean value, initially false. This state variable should be updated to true or false. So that parent component can rerender itself and its child component.
- selectedValue (At line 28) : This is also a state variable that holds value of the selected value from child component dialog box.
- handleClose() function (At line 30): This function will update the state variable open to false.
import { Button } from "@material-ui/core";
import React from "react";
import ChildCopmponent from "./CildComponent";
import Typography from "@material-ui/core/Typography";

const ParentComponent = () => {
  const emails = ["username@xyz.com", "username2@zyz.com"];
  const [open, setOpen] = React.useState(false);
  const [, setSelectedValue] = React.useState(emails[1]);

  const handleClickOpen = () => {
    setOpen(true);
  };

  const handleClose = (value) => {
    setOpen(false);
    setSelectedValue(value);
  };
  return (
    <div>
      <Typography variant="subtitle1">Selected: {selectedValue}</Typography>
      <br />
      <Button variant="contained" color="primary" onClick={handleClickOpen}>
        Open Dialog
      </Button>
      <ChildCopmponent
        emails={emails}
        selectedValue={selectedValue}
        open={open}
        onClose={handleClose}
      />
    </div>
  );
};
export default ParentComponent;
ChildComponent.js
Child Component will holds the dialog box from line 29-50. Which will display list of emails. And when ever a email from the list is selected handleListItemClick(selectedValue) at line 26 will be triggered and in turn will call onClose(selectedValue) (i.e is reference of the function passed from the parent.) onClose(selectedValue) in the parent component is responsible for setting its state attribute, open to false
NOTE: In the Parent-child component relationship, childComponent should not maintain any state of child’s as when we do so then whenever the child state is updated then DOM of the browser is not updated and it feels like nothing is happening. To update the DOM we need to update the parentComponent state. So that parent can be re-rendered.
Opening and Closing of dialog box in react
Now, many of you would have a question that how this dialog box is open or closed. You can see at line 30, <Dialog> element has two attributes onClose and open which accept a boolean value and is being set dynamically. These property regulates opening and closing of the dialog in material UI.
import React from "react";
import { makeStyles } from "@material-ui/core/styles";
import Avatar from "@material-ui/core/Avatar";
import List from "@material-ui/core/List";
import ListItem from "@material-ui/core/ListItem";
import ListItemAvatar from "@material-ui/core/ListItemAvatar";
import ListItemText from "@material-ui/core/ListItemText";
import DialogTitle from "@material-ui/core/DialogTitle";
import Dialog from "@material-ui/core/Dialog";
import PersonIcon from "@material-ui/icons/Person";
import { blue } from "@material-ui/core/colors";

const ChildCopmponent = (props) => {
  const handleClose = () => {
    onClose(selectedValue);
  };
  const useStyles = makeStyles({
    avatar: {
      backgroundColor: blue[100],
      color: blue[600],
    },
  });
  const { onClose, selectedValue, open, emails } = props;
  const classes = useStyles();

  const handleListItemClick = (email) => {
    onClose(email);
  };
  return (
    <Dialog onClose={handleClose} aria-labelledby="title" open={open}>
      <DialogTitle id="title">Set backup account</DialogTitle>
      <List>
        {emails.map((email) => (
          <ListItem
            button
            onClick={() => handleListItemClick(email)}
            key={email}
          >
            <ListItemAvatar>
              <Avatar className={classes.avatar}>
                <PersonIcon />
              </Avatar>
            </ListItemAvatar>
            <ListItemText primary={email} />
          </ListItem>
        ))}
      </List>
    </Dialog>
  );
};

export default ChildCopmponent;
Link To GIT
You can find complete code for this post at this link.
Conclusion
In this post, we learned to add material-ui to our react js app using below command
npm install --save @material-ui/core & npm install --save @material-ui/icons
Here we created dialog box in react And understood how we will use state lifting to separate our component in parent and child components.
We saw how Parent component shares its state props to child and child in turn update parent’s state to notify him of it’s changes so parent can update DOM.
And also we learned how we will be open and close the dialog box as <Dialog> element has two attributes onClose and open which value will regulate the opening and closing of the dialog box in react js.
Thanks, Note
Thanks for spending you valuable time on this post hope this post was use full to you and you learned something new today. If you like our post please share our post.
You might check out in the post to Open Dropdown On Button Click React JS


Pingback: itemprop="name">Open Dropdown On Button Click React JS - Techi Journal